


Did somebody say WINE?! One of my favorite things to do in my design projects is answer a need from my clients while staying within budget and creating a unique feature – all at once! Take this awesome DIY wine storage for example:
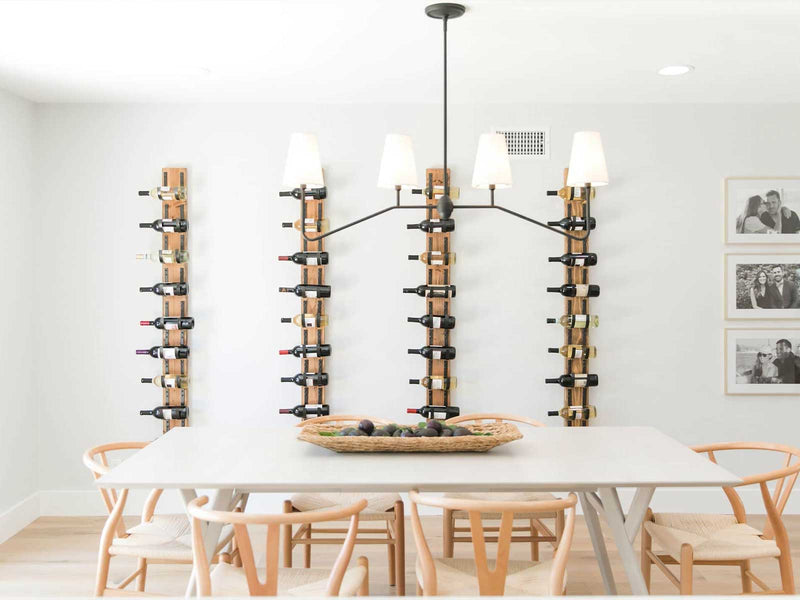
When I was designing this space on Help! I Wrecked My House, Season 1, Episode 4, my client told me she had a wine collection and loved having friends over for wine nights. I knew their dining space had a huge blank wall, and we didn’t have the budget to buy them large pieces of art to fill it.

Lightbulb idea! Why not create a really cool wine storage wall for them?! I looked around the jobsite and gathered most of what I needed for this project by using things we’d already purchased (that’s a win for the budget!). Once I made these wine racks and hung them on the wall, they added an architectural element to the whole space that wasn’t there before. And that also wouldn’t have be achieved by just hanging art. That’s a win for the design!

Plus, my client now had a functional place to store her wine – and that’s a win for organization!
This project was easy and fun, and delivered a huge impact, so I wanted to share it with you guys as a DIY. It would also make a great gift! If you make this, let me know how it turns out!

Note for gathering your materials: Before you order brackets or metal to make your own brackets, consider where your wine storage will go in your home. (Or if you’re making this for someone else, think about how much storage you’d like to give them). You can customize this project to make wine racks that are any length you want – and you can make as many as you want if you’d like to cover a large wall. Determine the height you want your rack to be, and write that measurement down. That way, when you go to buy your wood piece, you’ll know how long it should be. The length you plan for will also guide you in figuring out how many brackets you need to buy or make. Remember, there need to be two brackets for every one bottle of wine.
Prop up your wood piece on some sawhorses or two paint cans. Sand down your wood. Once your wood is sanded down, brush it off really well so there isn’t any leftover wood dust on your piece.

Dip your rag into the stain, let the excess drip off into the can, and rub the stain over the wood. Don’t forget to stain the sides! Once you’ve reached the stain color you want, leave your wood piece to dry per the manufacturer’s instructions.


If you’re making your own brackets (if you’re not, you can skip this step 😊 ), take your pancake and use your drill to screw it onto a spare piece of wood. Take your small spare wood piece and drill it onto the same piece of wood, next to the pancake. The distance between the pancake and the wood leverage piece should be the thickness of your metal pieces you’ll be bending. Once you have that all set up, watch my video again and see how I bend each metal piece around the pancake to make a wine bracket.


Also, you’ll need to pre-drill screw holes into your brackets so they can be screwed onto your wood piece (this should only apply if you’re making your own brackets and not using pre-made brackets).

When you’re done bending all your brackets, you can spray paint them black (or really any color!), and leave them to dry.

Now that your stain is dry, it’s time to mount the wine brackets! Take your brackets and lay them out on top of your wood piece. You need to lay two side-by-side for each bottle of wine you plan to store on this rack. This isn’t an exact science, just move them around (and use a real bottle of wine!) to figure out your spacing. Make sure you spread the brackets out enough from side to side so they can support the weight of a wine bottle. If you place them too close together, the bottle could tip over on one side.
Once your spacing is figured out, mount your brackets to your stained wood piece using a drill, making sure you drill in two brackets per row.

Go hang it on the wall! You can ask your local hardware store to help you select some mounting hardware to hang this rack. Or drill it directly into the wall, whichever works best for you. Just make sure this is mounted into studs – it will be heavy when it’s full of wine!


“You’re on my list now! I’ll always keep your name close at hand to remind me to read more of your stuff.
My dad is a wine collector, I’ll do this DIY Wine Storage Wall as my gift on his coming birthday. Thanks to you, I was able to have this kind of idea. May I know what wood is the most sturdy one? His wines are really expensive, I want his wines to be safe.
Every story you write is just a unique experience."
Glenwood
on September 29, 2022
“You’re on my list now! I’ll always keep your name close at hand to remind me to read more of your stuff.
My dad is a wine collector, I’ll do this DIY Wine Storage Wall as my gift on his coming birthday. Thanks to you, I was able to have this kind of idea. May I know what wood is the most sturdy one? His wines are really expensive, I want his wines to be safe.
Every story you write is just a unique experience."
Glenwood
on September 23, 2022
All blog comments are checked prior to publishing